


Are you searching for an alternative to Google Analytics that offers more control and flexibility over your website data? Look no further than Umami, the open-source solution to revolutionize web analytics. With Umami, website owners can track their data, delve into specific details, and gain valuable insights into user behavior. Say goodbye to the limitations of traditional analytics platforms and embrace the power of Umami to take charge of your website's performance. In this article, we'll explore the fascinating world of Umami and discover how it can elevate your analytics game to new heights.
Steps involved in setting up Umami for website analytics.
Fork the Umami Repository.
Deploying to Railway.
Setting Up Umami Dashboard.
Adding Script to track analytics.
1)Forking Umami Repository
The first thing we will be doing is visiting Umami's official website and going to the docs section. We will be navigating to running on the railway there because we will be using Railway to host our analytics. Umami allows us to self-host our analytics and it can be done using various providers like Railway, Vercel, netlify, Heroku, DigitalOcean, etc ...
As said earlier first thing to do is to fork the umami's official GitHub repository which can be found here. Then you can fork the repo. Once you've forked the repository in your account, you can clone that repo in your local machine and open that folder once it's cloned in your local machine.
Next up, we will navigate to that folder and delete the Dockerfile. Once you have deleted the docker file, you can commit this change that you have made into your forked repo. This can be done by navigating to the directory where you have cloned the project and using basic git commands like
git status :- Indicates that we deleted the Dockerfile.
git add . :- Stage changes for the next commit.
git commit -m "message" :- Add a commit message indicating the changes made.
git push :- Push changes to your repository (forked repo in our account).
2) Deploying to Railway
Once you finish the first step, the next step is to deploy this project onto the Railway.
What is Railway:-
Railway.app is a powerful platform that simplifies the deployment and management of web applications. With its user-friendly interface and seamless integration with popular development tools, Railway.app streamlines the process of deploying apps to the cloud.
In order to deploy the Umami project onto the Railway platform, One must signup on the railway. Once the Railway account is available we can create a new project on the railway and follow the below steps:-
Click on start a new project and select Deploy from the repo.
Select the repository that we cloned and made changes to from GitHub.
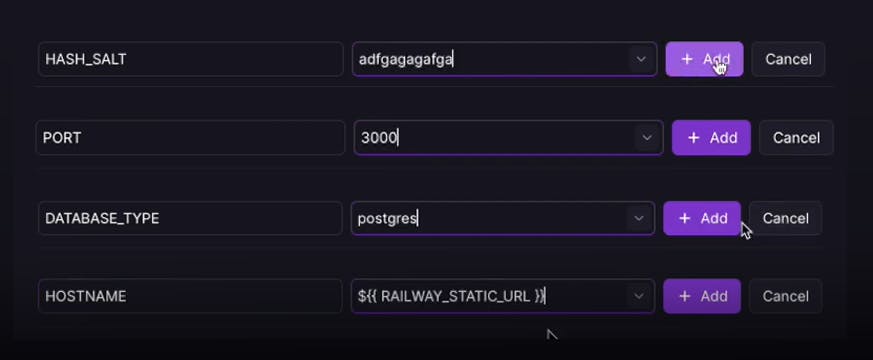
Click on add variables in the next step.

Next Up add the following variables as suggested by Umami's docs
After adding the variables, you may notice that deployment fails. This happens because we still have to set up a Postgres database. So no need to worry. Just follow the following steps.
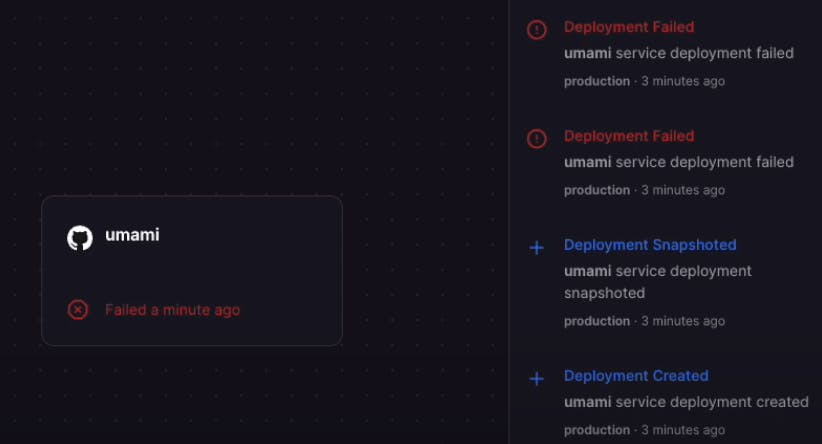
In order to fix our deployment click on the New button at the top right beside the settings button and click on Database >> Add Postgres SQL.
Once you add a Postgres database, then redploy the project.Then the project will get deployed successfully.

Then go to settings >> domains >> generate domain. This will generate a domain through which we can access our own analytics service publically. (PS: You can also modify this Domain)

After generating the domain, visit that link. After visiting the domain you will be asked to log in. You can log in to our service using the credentials as specified by Umami's docs. The default credentials are username is admin and the password is umami.

3)Setting up our Umami Dashboard
As we saw, Umami by default provides a credential that is not safe thus the most important and ideal thing to do after logging in is to change the password. You can do so by navigating to settings >> profile >> change password.
Now that we have successfully set up our service we can add websites to track for or add analytics to. We can do so by going to settings >> add website

Note: You can give a name and provide the deployed URL of the website you want to track. Make sure that it contains standard domain names. One important thing to remember is to make sure that the owner is admin.
We have the final step remaining. We have set up all the things correctly, However, our analytics still won't work because we still don't have any link between our site and our analytics service.
4)Add tracking code to our site
In order to track the users on our site, gain valuable insights or check traffic, we need to get a tracking code from Umami and include that script in our website's code.
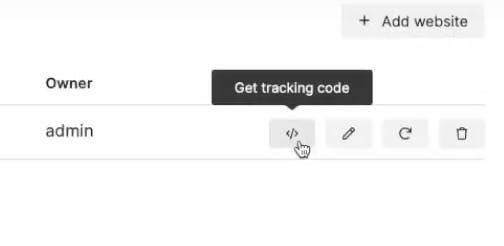
We can get the tracking code by navigating to settings >> click on the first icon among a set of icons from the website we just added.

As specified in the image above add the tracking code in the head section of your application and deploy the code. After you push the code and redeploy, analytics should be working fine.
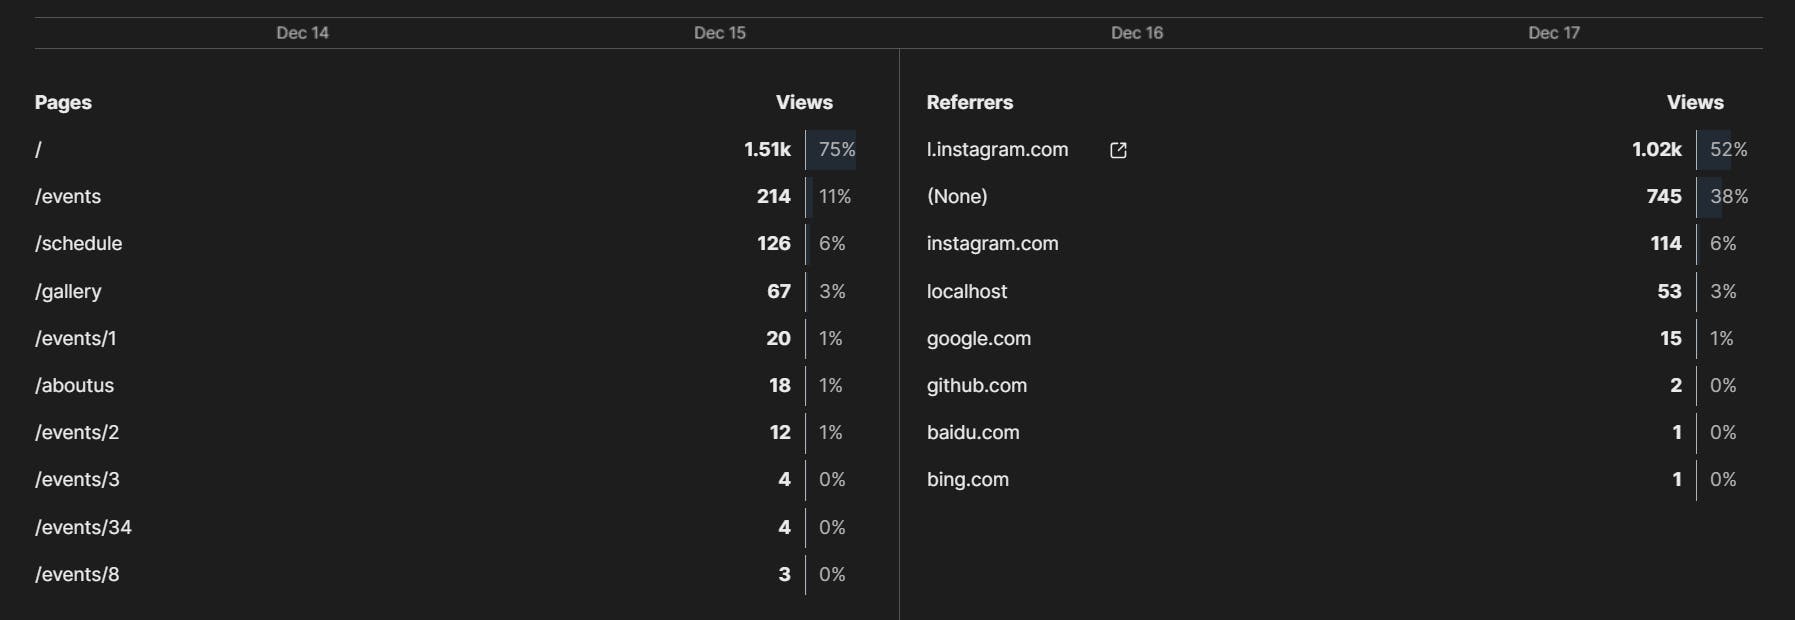
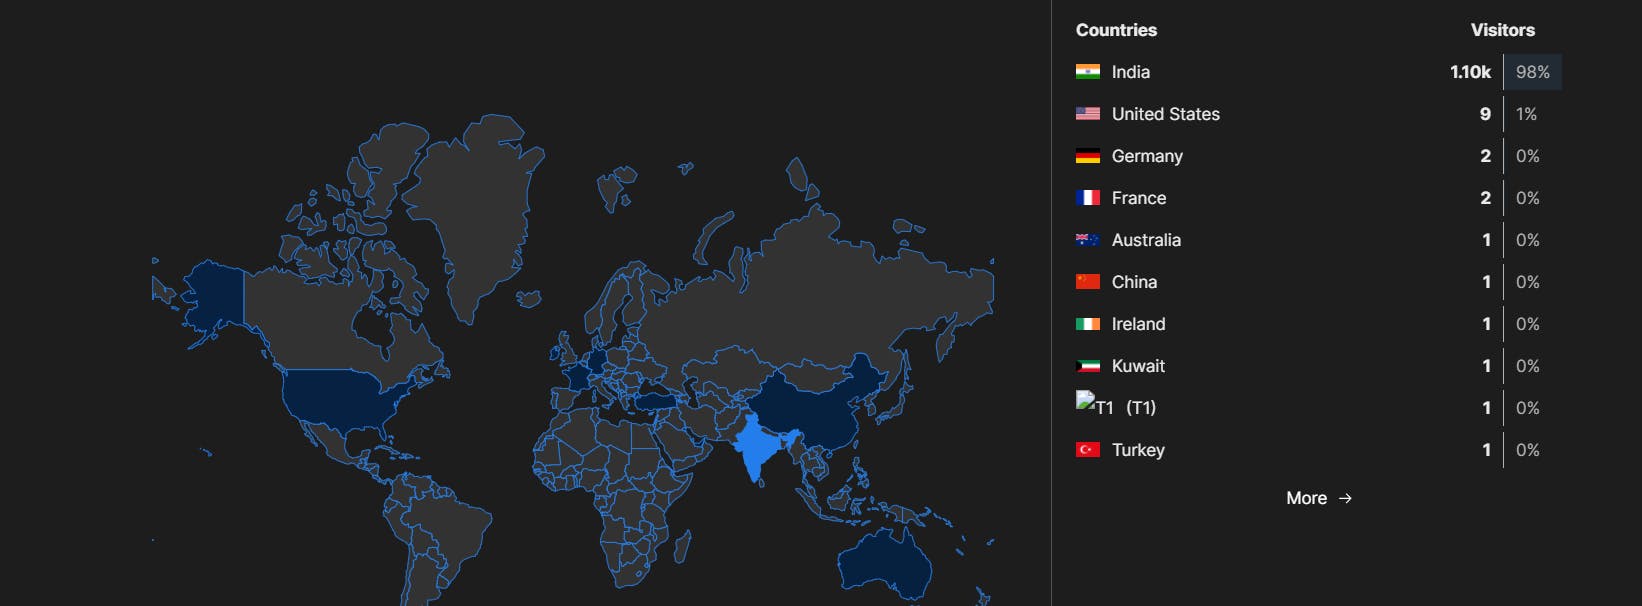
Here's how the analytics would look like after you get some traffic on your site.

I love Umami and I have been using it for a year and half for 2 - 3 projects of mine. It provides detailed details like pages, referrers, browsers of users, OS, Devices and Countries.

So I would like to conclude this post by saying that please give Umami a try and let me know. It's a great open source project and it works well and you can self host it as well. Thank you for reading this blog and that's all from my end for this post.